Part 1 - Introduction
Welcome to the our first tutorial on Making a Game with Phaser. Here we will learn how to create a small game involving a player running and jumping around platforms collecting stars. While going through this process we'll explain some of the core features of the framework.
What is Phaser?
Phaser is an HTML5 game framework which aims to help developers make powerful, cross-browser HTML5 games really quickly and, unlike some others, has solely been built to work with the mobile browsers. The only browser requirement is the support of the canvas tag. It also borrows a lot from Flixel.
How to Download and Unzip the Project Resources:
Download the source files and assets that go with this tutorial. It's above this text. Unzip them into your Documents folder. You need to be sure that you do unzip them - if they're still compressed they won't function properly. The movie on the left shows you how.
| |||
Requirements
You need to have a very, very basic knowledge of JavaScript.
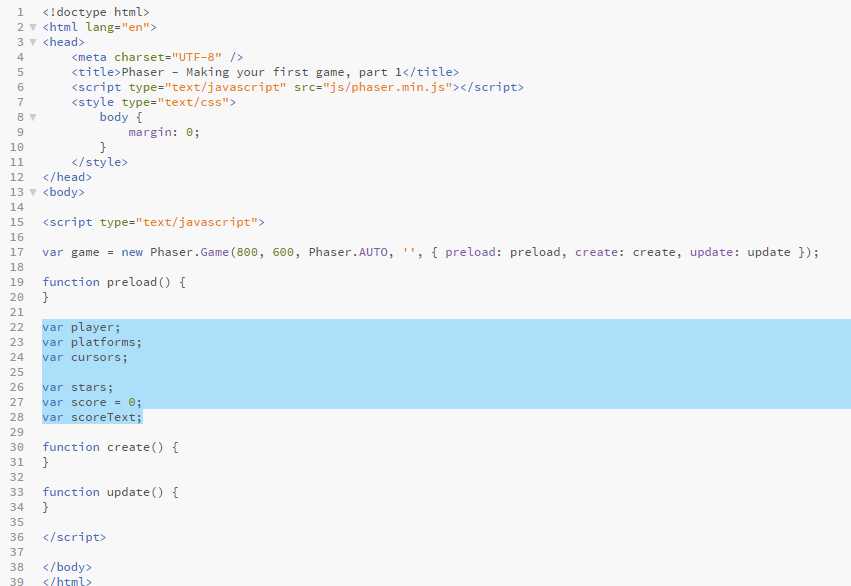
Open the Index1.html page in Brackets (right-click > Open With > Brackets) and let's have a closer look at the code. After a little boilerplate HTML that includes Phaser the code structure looks like this:
Open the Index1.html page in Brackets (right-click > Open With > Brackets) and let's have a closer look at the code. After a little boilerplate HTML that includes Phaser the code structure looks like this:
|
This is what the code should look like. Click the graphic to enlarge.

Add the following Global Variables after the Preload function:
var player; var platforms; var cursors; var stars; var score = 0; var scoreText; |
var game = new Phaser.Game(800, 600, Phaser.AUTO, '', { preload: preload, create: create, update: update });
function preload() { } function create() { } function update() { } |
Line 1 is where you bring Phaser to life by creating an instance of a Phaser.Game object and assigning it to a local variable called 'game'. Calling it 'game' is a common practice, but not a requirement, and this is what you will find in the Phaser examples.
The first two parameters are the width and the height of the canvas element that Phaser will create. In this case 800 x 600 pixels. Your game world can be any size you like, but this is the resolution the game will display in. The third parameter can be either Phaser.CANVAS, Phaser.WEBGL, or Phaser.AUTO. This is the rendering context that you want to use. The recommended parameter is Phaser.AUTO which automatically tries to use WebGL, but if the browser or device doesn't support it it'll fall back to Canvas.
The fourth parameter is an empty string, this is the id of the DOM element in which you would like to insert the canvas element that Phaser creates. As we've left it blank it will simply be appended to the body. The final parameter is an object containing four references to Phasers essential functions. Their use is thoroughly explained here. Note that this object isn't required - Phaser supports a full State system allowing you to break your code into much cleaner single objects. But for a simple Getting Started guide such as this we'll use this approach as it allows for faster prototyping.

